Building a Free Redirect System with Netlify and Google Sheets

Categorised in: Web Development / Technical SEO
Published:
Last updated:
At some point during a migration to a new domain name, you’ll come across the following challenge:
“We need to keep the old domain live to redirect to the new domain.”
This usually means you’ll have to continue to pay for a hosting account just to keep your redirects working.
You may have even purchased a dropped domain just for the SEO value of some backlinks that the domain might have had had. Usually, you’d need to point the domain to some paid hosting just for the redirects.
We don’t need to do this any more.
There is a simpler way to do this for free using a Google Sheet and some free hosting on Netlify.
The Google Sheet
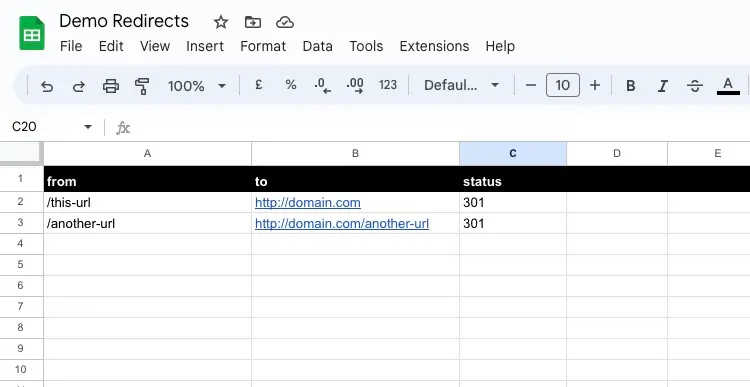
The first thing you need is a Google Sheet. Create this as follows
- Column A - From. This will be the URL you are redirecting from. You can remove the domain name here and it must start with a forward slash
- Column B - To. This is the destination URL or where you want the user to end up.
- Column C - Status Code. This will be one of
- 301 - for a permanent redirect to a new URL
- 302 - for a temporary redirect to another URL, which you’ll probably not need.
It should look something like this. (Unless you’re like me and you like to style the top row.)
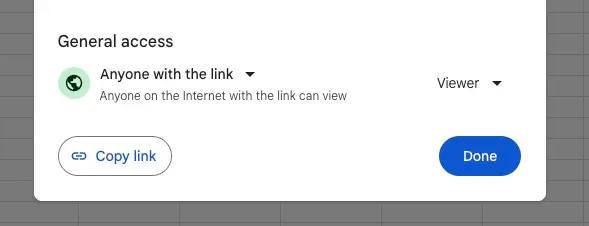
The last thing we need to do here is make this file public. To do that go to the share menu on the top right and change the settings to General Access where anyone with the link can view the file
The Code
If you don't want to know the ins and outs of how this works, you can skip to the "My Git Repository" section at the end of this post. If you want to follow along and code your own and learn what I used to make this script, keep reading.
So we need a script to parse the rows of the Google Sheet and generate a file that Netlify can use to handle the redirects.
Create a folder called redirect-system and add a file called build-redirects.js.
Open up a terminal window within that project and run the following commands:
npm initWhen asked by the terminal add the following
- package name will be redirect-system
- version will be 1.0.0
- description you can leave blank
- entry point will be build-redirect.js
- test command we can leave blank
- git repository we can leave blank as you’ll get access to the GIT repo later on
- keywords we can leave blank
- author can be your name if you’re coding along
- license we can leave blank
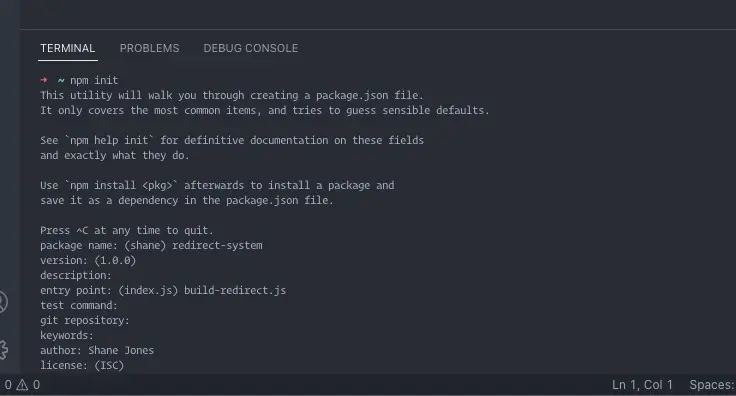
Click Enter, and it will ask you if this configuration is OK, to which you can just say yes.
Once that is done, you’ll have a package.json file in your project, and you’ll be ready to start installing some node packages in this project.
Node packages
So rather than completely code our own Google API connectors for Google Sheets, we’ll just use the tools we have that are available to us. Including this package, the Public Google Spreadsheet Parser
This plugin provides everything we need to connect a Google Sheet to our code.
To install this jump back in your terminal and paste in the following command then press enter.
npm i public-google-sheets-parser dotenv --saveThis will install that package for use within your project. It also installs dotenv which allows us to access environment variables for this project.
Building the script
First, we need to get some references to the Google spreadsheet. To grab these, copy the full URL of the Google Sheet
https://docs.google.com/spreadsheets/d/1bcB6CAx9jiBh5D8AXJytQbn7MJCSs4wUH82Ee_50rn4/edit#gid=0
So in this URL the first ID is the document ID, this is the longer string after /d/ and before /edit so in this case that will be 1bcB6CAx9jiBh5D8AXJytQbn7MJCSs4wUH82Ee_50rn4
Then we need the sheet ID, which is usually found following gid= in the URL; if this is a new sheet, this will likely be just 0, but if your redirect is on a new tab, it will be different, as you can see.
In your code editor create a file called .env and populate it as follows replacing YOUR_DOCUMENT_ID and YOUR_SHEET_ID with the values from your Google Sheet
DOCUMENT_ID=YOUR_DOCUMENT_ID
SHEET_ID=YOUR_SHEET_ID
This is where we can keep a number of secure variables for use within our script.
When we move over to Netlify we’ll need to upload these into their system
Now we can start to create our script
require('dotenv').config();
const DOCUMENT_ID = process.env.DOCUMENT_ID
const SHEET_ID = process.env.SHEET_ID

const PublicGoogleSheetsParser = require('public-google-sheets-parser')


const parser = new PublicGoogleSheetsParser(DOCUMENT_ID, { sheetId: SHEET_ID})
parser.parse().then((items) => {

  console.log('items', items);

})
In this code we’re
Accessing the .env values to link to the correct sheet
Initialising the Google Sheets plugin
Connecting with the Google Sheet and the specific spreadsheet.
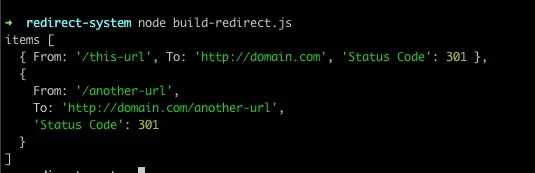
Logs out the rows as a JSON object.
You can run this file from your terminal using node build-redirect.js and you should see the following.
Netlify Redirects File
Within Netlify we have to create a configuration file to store the redirects called netlify.toml . This is just a basic text file with the URL from, URL to, and status code.
This file lives in the root of the project and is generally one of the first files Netlify looks for when creating a new deploy of your site.
[[redirect]]
	source = "/old-path"
	to = "/new-path"
	status = 301
You can find more information about this on the Netlify Redirects documentation .
Creating the redirects
Heading back into our code we need to create a file and populate it.
Firstly, we’ll need to create the output in the correct format.
Where you were logging out the rows in the code, replace it with the following code
parser.parse().then((items) => {
  let output = ''

  items.forEach(item => {

    const thisRedirect = `[[redirects]]\n` +
    `  from = "${item.from}"\n` +
    `  to = "${item.to}"\n` +
    `  status = ${item.status}\n\n`

    output = output + thisRedirect

  })

  console.log(output);
})
Within this block we’re initialising the output variable which is where we’ll save out string of information.
We then loop through the items using forEach and then we’re creating the oupstring and adding it to the already existing output.
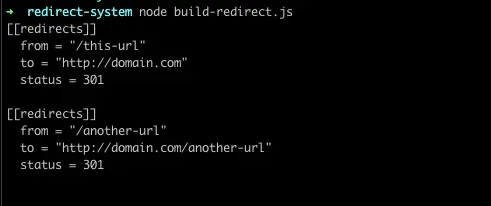
All being well your output should look something like this
Now all we need to do is save this to a file. We’ll just need to install a package to allow us to access the file system from this package.
In your terminal, run the following command
npm i fsThen back in your code on the first line, we need to include this package using
const fs = require('fs');Finally, where we were previously logging out the output string, add this code to save the output string to the netlify.toml file
fs.writeFile('netlify.toml', output, function (error) {
if (error) throw error;
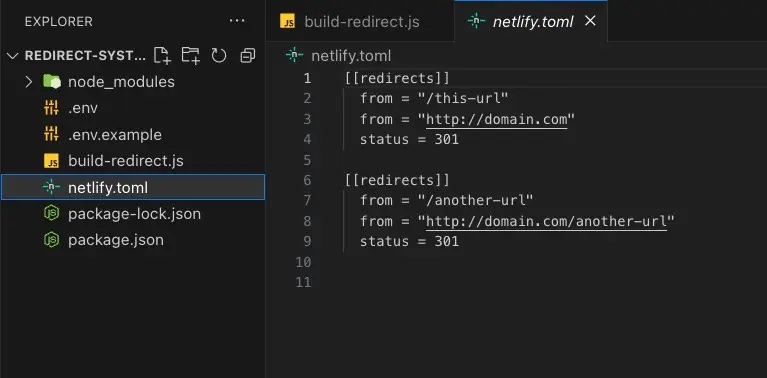
}); Now this time when you run the script there will be no output and you’ll notice a new file in the folder where this code lives.
Now as far as this script goes, it’s pretty much complete script but we could probably do with adding in some basic error checking.
Error Checking
Ideally, we want these builds to fail when something is missing or not as expected so that we can investigate any issues.
This first bit of error checking will check if our environment variables exist. If they do not exist, they will fail the build process and add a red line with some error text into the build logs so you know whats gone wrong with the build.
const fs = require('fs');

require('dotenv').config();
const DOCUMENT_ID = process.env.DOCUMENT_ID
const SHEET_ID = process.env.SHEET_ID

if (DOCUMENT_ID && SHEET_ID) {

	// ALL OF OUR OTHER CODE

} else {
  if(!DOCUMENT_ID) { console.error('DOCUMENT_ID is missing from the Environment Variables') }
  if(!SHEET_ID) { console.error('SHEET_ID is missing from the Environment Variables') }
}
We also need to check the data that is being added is valid too. These checks include making sure the URL’s and slugs are in the correct formats and that the status codes are
We can create three functions to manage these tests. These are below.
The first two functions check for valid URL’s one of which will be the relative URL check which is the format we require the from URL to be in and the second will be an absolute URL check which is what we need the to URL to be. The last function will check if the status code is one which we’re expecting for a URL redirect.
function relativeUrlCheck(url) {
  const relativePattern = new RegExp(
    '^\\/[-a-z\\d%_.~+]*' +
    '(\\/[-a-z\\d%_.~+]*)*' +
    '(\\?[;&a-z\\d%_.~+=-]*)?' +
    '(\\#[-a-z\\d_]*)?$', 'i'
  )

  return !!relativePattern.test(url)
}
function absoluteUrlCheck(url) {
  const absolutePattern = new RegExp(
    '^(https?:\\/\\/)+' +
    '((([a-z\\d]([a-z\\d-]*[a-z\\d])*)\\.)+[a-z]{2,})'+
    '(\\/[-a-z\\d%_.~+]*)*'+
    '(\\?[;&a-z\\d%_.~+=-]*)?'+
    '(\\#[-a-z\\d_]*)?$', 'i'
  )

  return !!absolutePattern.test(url)
}


function statusCodeCheck(statusCode) {
  const acceptableStatusCodes = [301, 302]

  return acceptableStatusCodes.includes(statusCode)
}
We’ll then call these functions and trigger some error output in the forEach loop section as follows.
You can also see here that we’re outputting the spreadhseet row number here. This should help you debug the spreadsheet if you have thousands of lines in there.
let hasErrors = false
parser.parse().then((items) => {
  let output = ''

  items.forEach((item, line) => {
    const spreadsheetRow = line + 1
    let testsPass = true

    const fromCheck = relativeUrlCheck(item.from, true)
    const toCheck = absoluteUrlCheck(item.to)
    const statusCheck = statusCodeCheck(item.status)

    if (!fromCheck) {
      console.error(`SPREADSHEET ERROR - Invalid From URL on Spreadsheet Row ${spreadsheetRow}`)
      testsPass = false
    }

    if (!toCheck) {
      console.error(`SPREADSHEET ERROR - Invalid To URL on Spreadsheet Row ${spreadsheetRow}`)
      testsPass = false
    }

    if (!statusCheck) {
      console.error(`SPREADSHEET ERROR - Invalid Status Code on Spreadsheet Row ${spreadsheetRow}`)
      testsPass = false
    }

    if (testsPass) {
      const thisRedirect = `[[redirects]]\n` +
      `  from = "${item.from}"\n` +
      `  to = "${item.to}"\n` +
      `  status = ${item.status}\n\n`

      output = output + thisRedirect
    } else {
      hasErrors = true
    }

  })

  if (!hasErrors) {
    fs.writeFile('netlify.toml', output, function (error) {
      if (error) throw error;
    });
  } else {
    console.error('Please check through the errors above to resolve the issues in this deploy.')
    process.exit(1);
  }
You’ll also notice there we now have a hasErrors variable being set too. We need to add this in at the top of our file.
If this variable is true this will kill our script and ensure we see all errors output in the build log rather than just each error one by one.
You’ll see all of this code in the next block. Below you can see an example of what the script does when there is invalid.
Here you can see the spreadsheet with the some example rows that were added to ensure the script errors.
Below you can now see your full code example for the build-redirects.js with all of the error checking.
const fs = require('fs');

require('dotenv').config();
const DOCUMENT_ID = process.env.DOCUMENT_ID
const SHEET_ID = process.env.SHEET_ID

function relativeUrlCheck(url) {
  const relativePattern = new RegExp(
    '^\\/[-a-z\\d%_.~+]*' +
    '(\\/[-a-z\\d%_.~+]*)*' +
    '(\\?[;&a-z\\d%_.~+=-]*)?' +
    '(\\#[-a-z\\d_]*)?$', 'i'
  )

  return !!relativePattern.test(url)
}
function absoluteUrlCheck(url) {
  const absolutePattern = new RegExp(
    '^(https?:\\/\\/)+' +
    '((([a-z\\d]([a-z\\d-]*[a-z\\d])*)\\.)+[a-z]{2,})'+
    '(\\/[-a-z\\d%_.~+]*)*'+
    '(\\?[;&a-z\\d%_.~+=-]*)?'+
    '(\\#[-a-z\\d_]*)?$', 'i'
  )

  return !!absolutePattern.test(url)
}

function statusCodeCheck(statusCode) {
  const acceptableStatusCodes = [301, 302]

  return acceptableStatusCodes.includes(statusCode)
}

if (DOCUMENT_ID && SHEET_ID) {

  const PublicGoogleSheetsParser = require('public-google-sheets-parser')

  const parser = new PublicGoogleSheetsParser(DOCUMENT_ID, { sheetId: SHEET_ID })

  let hasErrors = false
  parser.parse().then((items) => {
    let output = ''

    items.forEach((item, line) => {
      const spreadsheetRow = line + 1
      let testsPass = true

      const fromCheck = relativeUrlCheck(item.from, true)
      const toCheck = absoluteUrlCheck(item.to)
      const statusCheck = statusCodeCheck(item.status)

      if (!fromCheck) {
        console.error(`SPREADSHEET ERROR - Invalid From URL on Spreadsheet Row ${spreadsheetRow}`)
        testsPass = false
      }

      if (!toCheck) {
        console.error(`SPREADSHEET ERROR - Invalid To URL on Spreadsheet Row ${spreadsheetRow}`)
        testsPass = false
      }

      if (!statusCheck) {
        console.error(`SPREADSHEET ERROR - Invalid Status Code on Spreadsheet Row ${spreadsheetRow}`)
        testsPass = false
      }

      if (testsPass) {
        const thisRedirect = `[[redirects]]\n` +
        `  from = "${item.from}"\n` +
        `  to = "${item.to}"\n` +
        `  status = ${item.status}\n\n`

        output = output + thisRedirect
      } else {
        hasErrors = true
      }

    })

    if (!hasErrors) {
      fs.writeFile('netlify.toml', output, function (error) {
        if (error) throw error;
      });
    } else {
      console.error('Please check through the errors above to resolve the issues in this deploy.')
      process.exit(1);
    }

  })
} else {
  if(!DOCUMENT_ID) {
    console.error('ENV VAR ERROR - DOCUMENT_ID is missing from the Environment Variables')
  }
  if(!SHEET_ID) {
    console.error('ENV VAR ERROR - SHEET_ID is missing from the Environment Variables')
  }
  console.error('Please check through the errors above to resolve the issues in this deploy.')
  process.exit(1);
}
Time to get this live but before we do, there are some files that we don’t want to push up into our repository. To do this we need to create a .gitignore file.
This tells git to ignore anything in this file. All we need for the contents of this is
node_modules
.env
netlify.toml- node_modules will be creates at the build step on Netlify based on the contents of the package.json file
- The contents of
.envwill be added in Netlify’s dashboard for this projects - And netlify.toml will be generated in the build step too
Now we’re ready to get this published.
Creating Your GitHub Repository
We now need to set this up on GitHub. If you don’t already have one, create an account at GitHub.com .
Once you’re all signed up head to github.com/new/ and create a new repository where we’ll save this code.

You also want to create this as a private repo.
Once these settings are in, hit the big green create repository button.
This will take you to your page and you’ll see a quick setup box with a https URL on the right. Copy that URL and head over to your terminal.
The following steps assume that you have git command line tools set up on your machine.
You’ll need to run the following commands in this order and hit enter. You’ll need to replace the REPO_URL with the URL that you have copied to create the link to your repo.
git init

git remote add origin REPO_URL

git add .

git commit -m "Uploading redirect script"

git push origin main
In order of what we’re doing here.
- We initialise a new local git repository
- Link the local git repository to the remote git repository
- Stage all files for commit. Using the dot tells git to use all changed or new files.
- We then create a commit with a useful message
- And finally we push all the code to GitHub
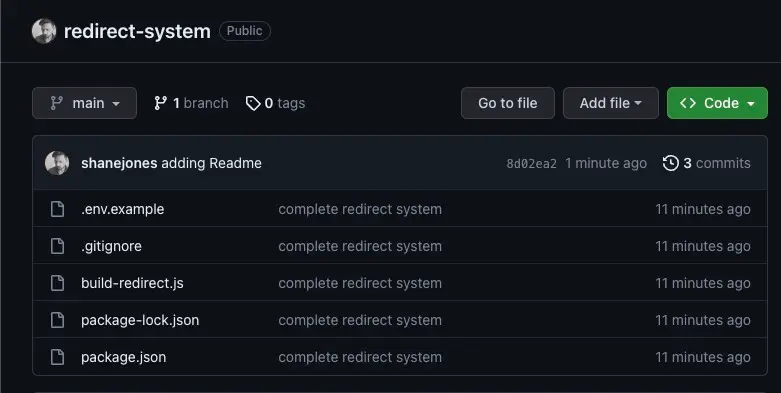
If you head back to the repository in GitHub you should see all of your files stored on GitHub.
Setting up Netlify
For the final step, get yourself a Netlify account if you don’t already have one.
Once you’re signed up and logged in you should see something like this page
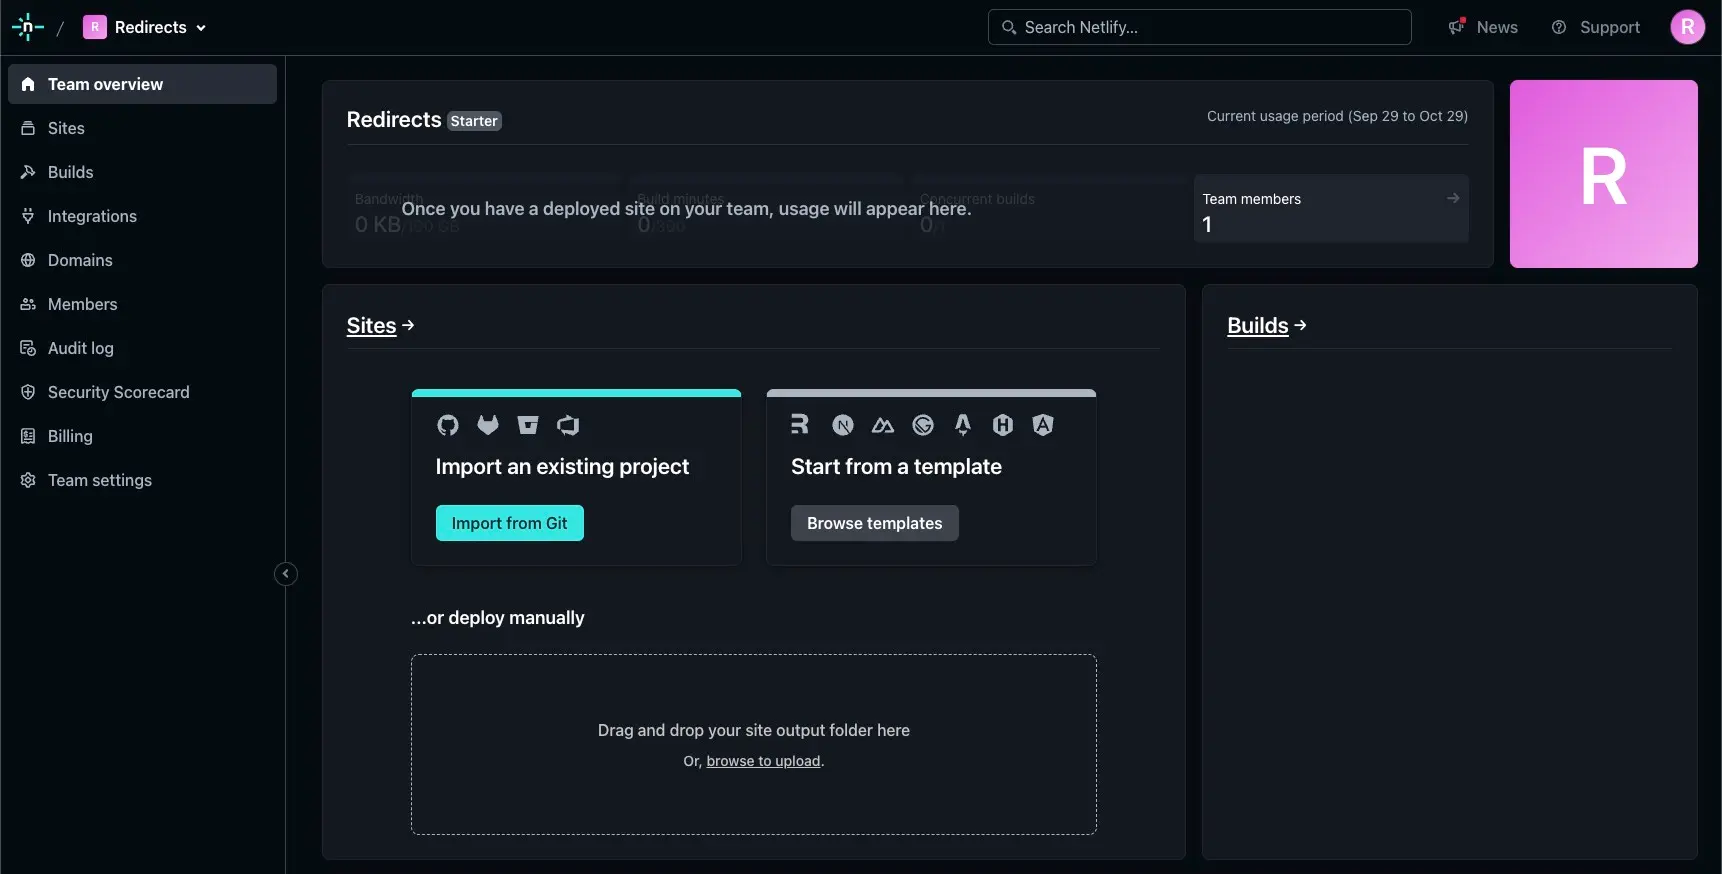
As we’ve just saved our code to GitHub we can hit the Import from Git button.
If you follow the steps to connect your GitHub account you’ll end up at a screen that shows all of your GitHub repo’s.
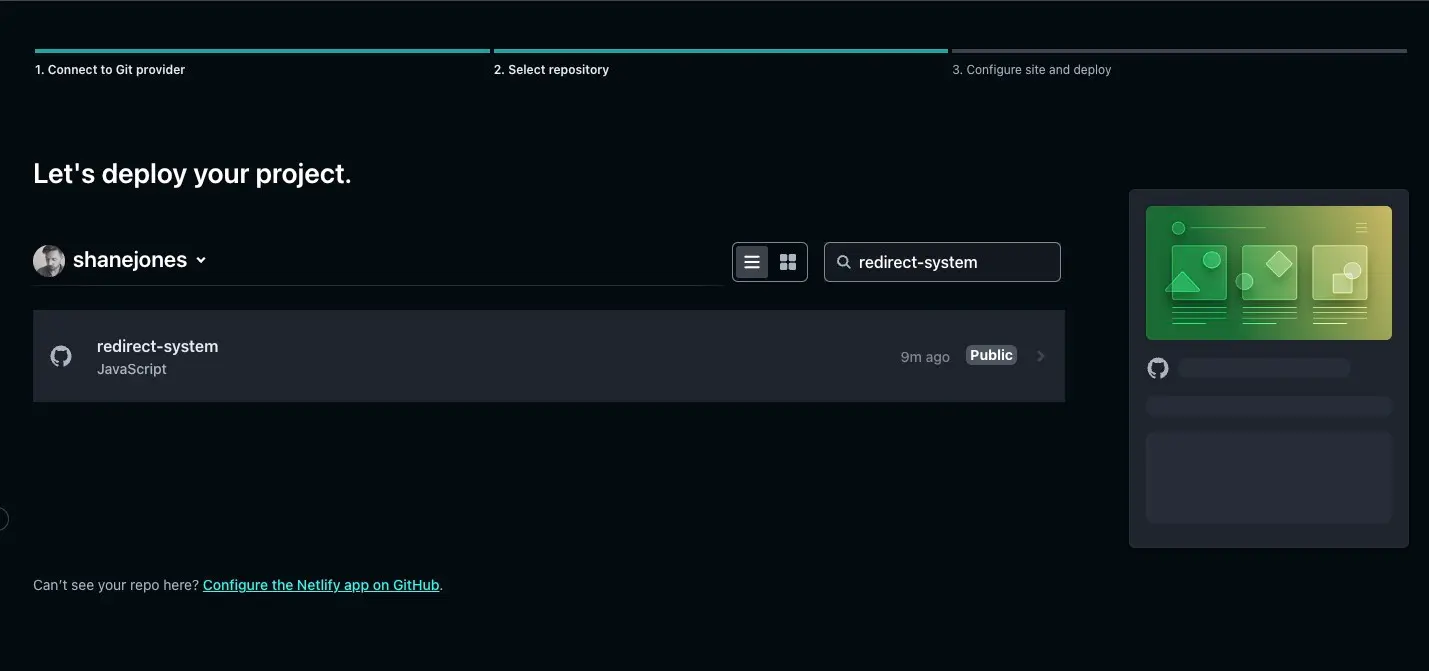
Click on the repo you created and we’ll need to add in some settings.
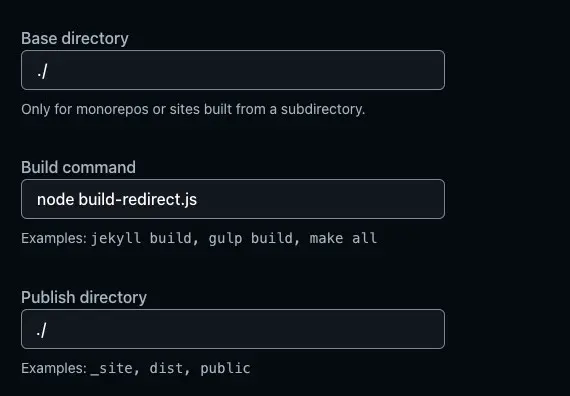
If you scroll down you’ll see these 3 fields. Update the contents as follows. This is telling Netlify to run and publish everything in the root of the project and also run the build command for our script.
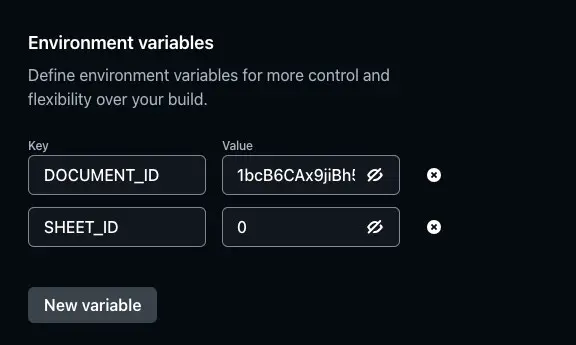
We then need to add the contents of our .env file to Netlify, You’ll see a button for Add environment variables further down this page.
If you click on that and add 2 new variables with the values from your .env file
Then to make this live, click the green deploy button at the bottom of the page
In the background this will spin up a server, grab your code from github, run it with the environment variables and save the redirect file to the server.
All being well, you should see something that looks like this, this shows your code has built successfully.
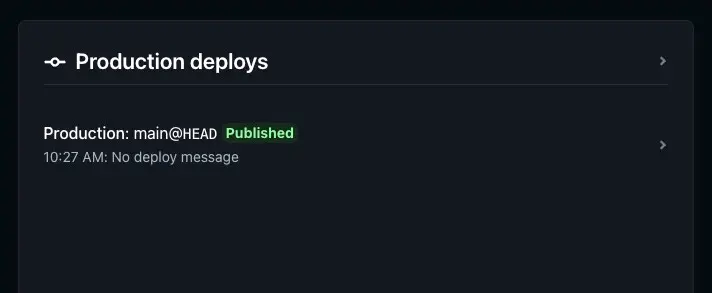
If it shows a failed message you can click into that deploy and it will give you some information as to why it might have failed. Remember the Error Checking we added in before? This is where you will see those error messages if this is something to do with invalid data in the spreadsheet
Now we need to link your domain name to this instance as the final step. To the left of the netlify page you are on there is a sidebar menu, click on Domain management.
Then click on Add a domain and follow the steps to add the domain to this Netlify instance.
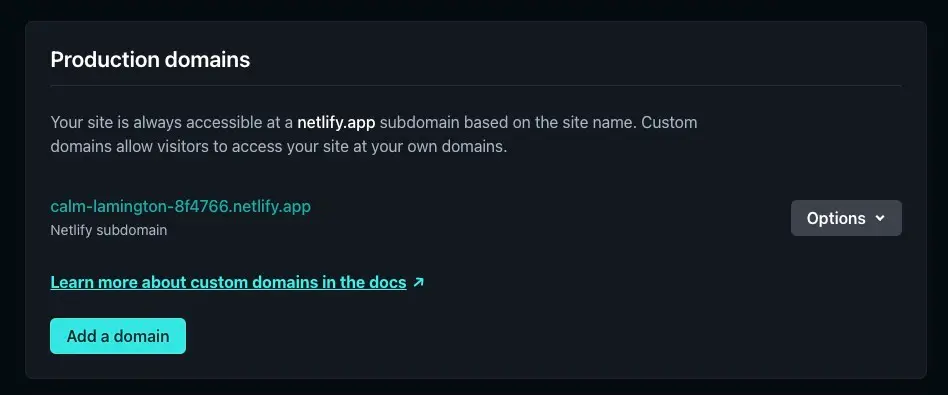
It will give you either an A record or a CNAME at the end of this process. Update your DNS with these new values and when all is propagated your redirects will be live and ready for you to test.
Setting this up on multiple domains from the same spreadsheet
Now you have your code in a GitHub repo you can simply re-use this over a number of domains.
Firstly create a new tab in the redirects spreadsheet for this new domain and add in your redirects.
Then come back to the Netlify process above to add a new instance, the only change we need to do is change the spreadsheet id. If your new tab is the second tab along, the SHEET_ID will now be 1.
Finally, link up your domain to the new instance and you’re all live.
My Git Repository
If you don’t fancy coding this whole solution for yourself, you can just use my repo and deploy straight to Netlify using the below link.

You’ll still need to follow some of the Netlify steps above around the build process and environment variables though but that should get it all live much quicker for you.
Hey there, If you found this post useful, please can you head to the below Tweet and give this a quick like and retweet. Thanks!
🚨 New Blog Post 🚨
— Shane 📈🚀 (@shanejones) October 27, 2023
Here's how you can redirect an old domain and all of the pages to a new one, FOR FREE, using Google Sheets and Netlify.
You don't need to keep an old server active just for redirects any more!#techseo #webdevhttps://t.co/0eNDsiEYsM